
Are you a professional photographer? Or at least an amateur? Then you’re probably trying to do everything you can to get great images, but even that is not enough.
At the point when you meet different photographers, you can hear them discussing new items just delivered by some manufacturers. Why does this happen? Why are some photographers so fixated on stuff? A new lens can help make the image a little sharper or create a more dramatic bokeh, but the best way to get better quality images is to improve your own photography skills.
Before you think about buying something new, consider the key points of photography and decide whether you know everything. Have you tried to improve your skills? Have you mastered your skills well enough? Do you have the knowledge that will polish your photography? Follow these simple rules to avoid the most popular mistakes.
Once again about the light!
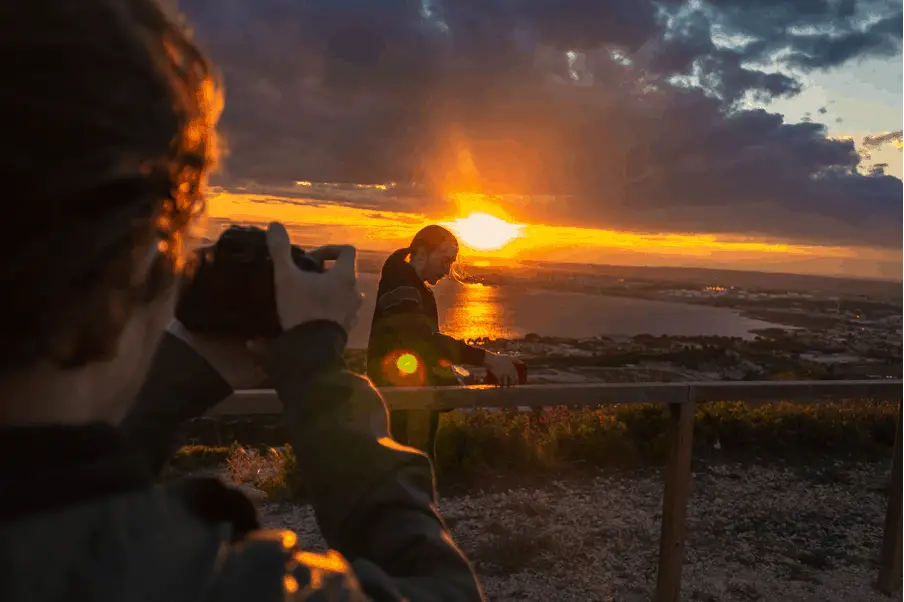
Light is essential to any image you’re trying to recreate. If you need to get a well-defined image, you need to shoot in a good light. For a more dramatic effect, you can use a different type of lighting. But you shouldn’t unconditionally use a concept such as ‘poor light.’ Light can simply be the best for a certain type of photography as an important component of great shots.
How do you overcome the tendency to take photos outdoors at all hours of the day? Just make it a rule to use the ‘golden hour’ in photography. Think in advance about which scene you are going to shoot, which time of day is best for it (morning or evening), according to your planned shoot, and get out on a photo hunt in time.
Do not take 10 shots of the same scene, just 1 or 2, but be attentive to the details. When you work with light, results don’t wait long.
Time is of the essence
Famous photographer Henri Cartier-Bresson, a classic of photography, used to talk about the importance of the “decisive moment.” You can either take a picture too early, and the scene won’t have time to unfold, or too late, and time will pass, the action will end, and you’ll never get a good shot because you missed the moment.
Obviously, it is difficult to anticipate occasions, yet with practice, you can improve at what you do in case you practice perception. Mindfulness comes with it, and you start to feel the ideal moment to take the shot.

It’s different for each photographer and each photograph. It may be a moment of laughter, or the moment before the first tears, a snapshot of shock or excitement. The moments are unique, and every photographer catches them in an unexpected way.
Manage your exposure
We all know that it is very important to be able to control one of the main parameters in photography — the exposure. But how can a photographer control the exposure?
![]()
Control the shutter speed and aperture. Do not let the camera automatically direct the process — it makes the objects blurred. If you still shoot in the auto mode, it’s time to think about how you can hone your skills. Learn how shutter speed and aperture change your images. This knowledge will help you take quality pictures in all kinds of lighting conditions.
Use what you have
If you have a camera released less than ten years ago, consider that you have the perfect tool for taking quality pictures and the most you have to look out for is selecting the right lens. Practice your 100 shots – on aperture priority, or shoot 100 shots with simply a half-pint (50mm). Try not to swap lenses until you have 100 pictures of various looks and conditions to think about.
Find your style in photo editing
There are styles, trends, and fashions in any creative activity. A single photo may be processed in different ways, and all options will have a chance to live up to the hype. Once you’ve learned not to make mistakes, start looking for your recognizable style, not just in photography but also in processing. It will determine which programs, techniques, and tools you use.

When it comes to choosing your first post-processing software, it may feel like you’re going in circles. The choice is so vast, and the very idea of learning something completely new can be daunting. I suggest you choose one of these three programs. I hope this info will help you make the right choice.
Adobe Lightroom
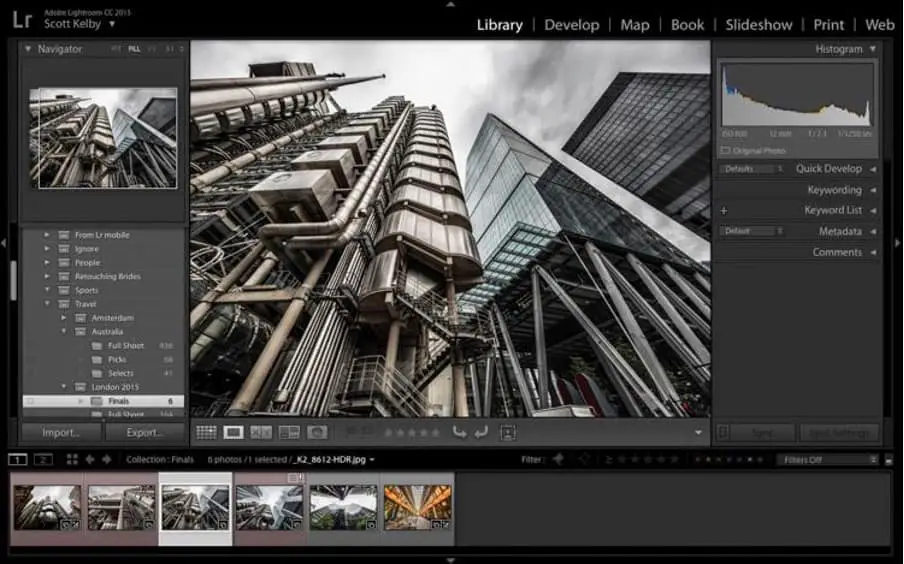
Adobe Lightroom is an easy-to-use cataloguer and a full-featured RAW converter with photo publishing functions. It is a very useful tool, which is why many photographers use Lightroom for all their work and Photoshop as a last resort.
One of Lightroom’s great features is the library of presets. A preset is a set of changes that can be applied with one click. It can be created both for photo processing and for filling in the data about the photographer and even set a list of criteria for filtering photos. For example, you can add the author’s information (name, website address, usage rights, etc.) into a hundred photos in an instant. All you have to do is highlight all the photos and click on the desired preset.
Features:
- Easy to use and user-friendly interface
- Excellent cataloguing tools
- Powerful processing tools
- Lightroom supports many plug-ins
- Easy to upload photos to social networks and websites
- Create your photo book right in the program
- Backup
Adobe’s Creative Cloud platform is a subscription-based model that gives you access to both Photoshop and Lightroom for $10/month. The reason for paying extra for Adobe is not because you’ll have improved editing capabilities, but because they integrate with other parts of the program, as well as access to tutorials.
Movavi Picverse
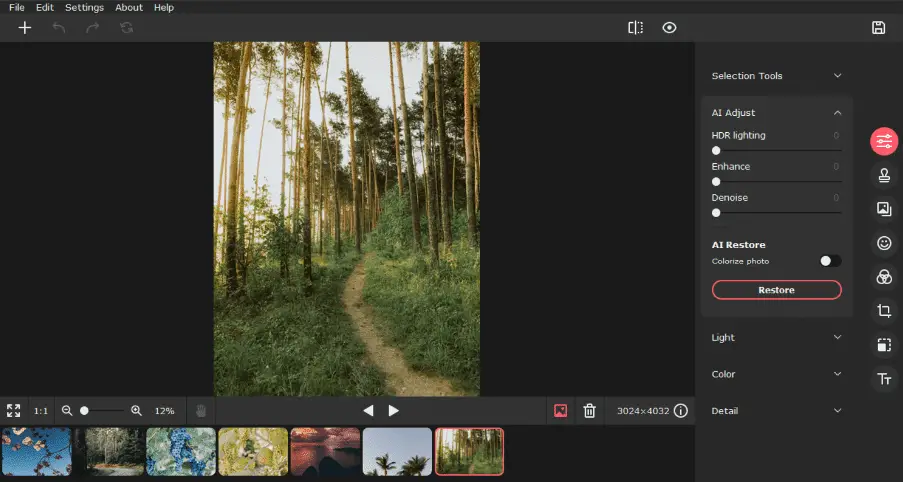
Movavi Picverse is a multifunctional graphic editor. The program boasts an excellent set of tools for image processing, editing, and viewing. You can say that it is a “home studio” at a professional level. The developers were able to achieve maximum functionality while maintaining easy operation and high speed.
Key benefits of Movavi Picverse:
- All necessary photo-processing functions;
- Intuitive menu navigation with drag & drop simplicity;
- A large number of filters and effects;
- An automatic photo enhancement mode;
- A handy tool for retouching people’s faces and bodies;
- Removal of unnecessary objects or backgrounds in 3 clicks;
- The ability to fully evaluate the features of the program by downloading a trial version;
DXO OPTICS PRO
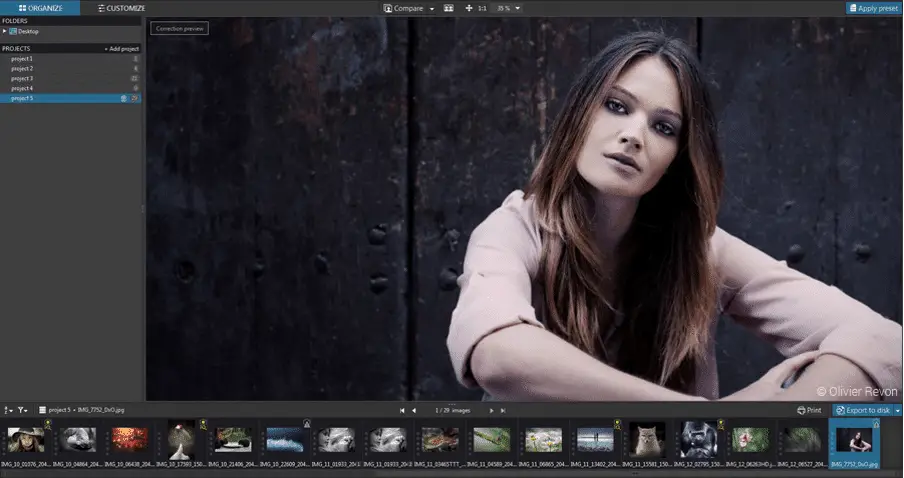
This is a pretty powerful editor, similar to Lightroom, it’s great at processing RAW files. But best of all, it copes with the correction of geometric distortion, in this area, no editor has not yet been able to catch up with DXO Optics Pro.
There are two versions of the DxO OpticsPro. If you use semi-professional cameras, you can use the Essential version. And for professional camera models, you can choose the Elite version. Here are the differences between the two versions.
- Quality noise reduction.
- ClearView contrast enhancement.
- Anti-moiré treatment.
- Workflow support with colour management.
- More control over presets.
Sum up the knowledge
Nothing like practicing photography to improve your theoretical knowledge. You have to practice all the time, spend hours mastering the techniques you already own and consider buying a new camera only if your equipment settings limit your creativity. Mix genres, try different lights. Practice, practice, and practice once again – only it can significantly improve your skills. And with mastery comes the understanding of what to choose from the endless innovations in photographic equipment that your creative soul demands and needs.
